
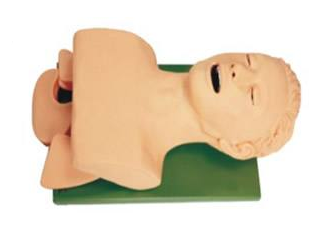
This model is designed and fabricated based on normal human anatomy, from its overall shape to all its main components. The upper chest wall and head bones are made using fiberglass reinforced plastic, while the face, nose, mouth, tongue, epiglottis, larynx, trachea, bronchi, esophagus, lungs, stomach, and the upper chest shape are created using soft and elastic plastic. An movable lower jaw is installed to enable the mouth to open and close. The movement of the cervical joints allows the head to tilt backward up to 80 degrees and forward up to 15 degrees. There are light signals indicating the insertion site for the tube. The operator can perform intubation training following the conventional steps for intubation.
Oral tracheal intubation method:
1. Preoperative preparation for intubation: A: Check the laryngoscope. Ensure that the laryngoscope blade and handle are properly connected, and the front light of the laryngoscope is on. B: Check the cuff of the catheter. Use a syringe to inflate the cuff at the front end of the catheter, confirm that there is no air leakage from the cuff, and then evacuate the air from the cuff. C: Dip a soft cloth in lubricating oil and apply it to the tip of the catheter and the surface of the cuff. Dip a brush in lubricating oil and apply it to the inner side of the trachea to facilitate the movement of the catheter.
2. Place the dummy in a supine position with the head tilted backward and the neck raised, so that the mouth, pharynx and trachea are basically aligned on a single axis.
3. The operator stands beside the mannequin’s head, holding the laryngoscope with his left hand. The illuminated laryngoscope should be tilted at a right angle towards the throat. The laryngoscope blade should be inserted along the back of the tongue to the base of the tongue, and then slightly lifted upwards. The edge of the epiglottis can be seen. Place the front section of the laryngoscope at the junction of the epiglottis and the base of the tongue. Then lift the laryngoscope again to view the glottis.
4. After exposing the glottis, hold the catheter with your right hand and align the front section of the catheter with the glottis. Gently insert the catheter into the trachea. Insert it about 1 cm into the glottis, then continue to rotate and further insert it into the trachea. For adults, it should be 4 cm, and for children, it should be about 2 cm. Generally, the total length of the catheter in adults is 22-24 cm (this can be adjusted according to the patient’s condition).
5. Place a dental tray beside the tracheal tube, and then withdraw the laryngoscope.
6. Connect the resuscitation device to the catheter and squeeze the resuscitation bag to blow air into the catheter.
7. If the catheter is inserted into the trachea, inflation will cause both lungs to expand. If the catheter accidentally enters the esophagus, inflation will cause the stomach to expand and a buzzing sound will be emitted as a warning.
8. After confirming that the catheter has been accurately inserted into the trachea, securely fix the catheter and the dental tray with long adhesive tape.
9. Use an injection needle to inject an appropriate amount of air into the cuff. When the cuff is inflated, it can ensure a tight seal between the catheter and the tracheal wall, preventing air leakage from the mechanical respirator when delivering air to the lungs. It can also prevent vomit and secretions from flowing back into the trachea.
10. Use the syringe to evacuate the cuff and remove the cuff holder.
11. If the laryngoscope is used improperly and causes pressure on the teeth, an alarm sound will be triggered.
Post time: Nov-11-2025